It’s that time of year when the urge to put things in order can strike. You may have a closet with a lot of biology materials that you want to evaluate. Here are my suggestions for things to throw out. You may not want to discard the whole material just because it has flawed content provided it is feasible to fix the problems.
In the animal kingdom materials, if you find anything that has the phylum Coelenterata, please remove that name or cover it. Biologists haven’t used it for more than 30 years. That phylum was split into two others when biologists discovered that it held two unrelated groups. The two lineages are called phylum Cnidaria (anemones, corals, and jellyfish) and phylum Ctenophora (comb jellies). It is likely that you can cover over “Coelenterata” and add the label “Cnidaria.” Just make sure that you don’t have comb jellies in with your cnidarians.
Another no-no for the animal kingdom is showing protozoa along with the animals. This goes back to the two-kingdom idea of classification, and biologists and biology textbooks haven’t grouped protozoans with animals in more than 40 years.
If you find a chart that is labeled “Non-Chordates,” change the title to “Invertebrates.” Maybe “non-Chordate” was useful in the past, but biologists use “invertebrate” far more often. I searched books on Amazon.com using “non-chordates,” and I got six titles, all published outside the US. I searched “invertebrates,” and got over 6000 titles. A non-chordate chart isn’t likely to show current information, so it is time to recycle it or at least recycle the images and add new text.
The relationships between the phyla of animals solidified about 15 years ago. In biology, classification has morphed into systematics, which all about relationships and shared common ancestry. The details of this would take several blogs so I will simply say that the arthropods are related to the nematodes, and the mollusks are related to the annelids. Arthropods were once grouped with annelids, but that is no longer considered valid. Can you add something to your animal kingdom chart that shows which phyla are closely related? See my book, Kingdoms of Life Connected, for help if your animal kingdom chart needs a redo. https://big-picture-science.myshopify.com/collections/frontpage/products/kingdoms-of-life-connected-second-edition. It is also available as an ebook (pdf).
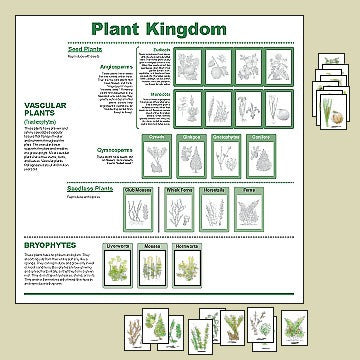
Dig back into the cobwebs in the botany section of your closet. If your chart of the plant has club mosses separated from the fern clade – whisk ferns, horsetails, and ferns – you have a good representation of life’s diversity. The chart from InPrint for Children is a good example. https://big-picture-science.myshopify.com/collections/montessori-botany-materials/products/plant-kingdom-chart . Another mark of a current material – it should use the term “eudicots” instead of “dicots.” If your chart has phylum names, it is quite possible that many of the names are obsolete. Many botanists no longer use phyla or division names. Instead, they use lineage names, and sometimes a common name is all you need. I have a graduate level botany textbook that uses no phylum/division names.

If your plant kingdom chart has fungi or bacteria on it, the time has come to do some serious pruning. Those two have to go to their own charts. If the image of a fungus appears on a plant kingdom chart, that’s what children will remember even if you say that it doesn’t belong there. The fungus kingdom is a sister to the animal kingdom. In nature, fungi and plants are partners, but on classification charts, they shouldn’t hang around together.
If you have a Five Kingdoms chart, file it under the history of biology. It should NOT be the first thing children see as they study the diversity of life. The Tree of Life is the place to start.
How about your timeline of life? This is a difficult material to do well, and there are many bad attempts out there. Does your timeline show several red lines coming together (converging)? That’s the traditional style, but lineages do not converge (fuse together); they diverge (split apart). Maybe you could salvage the images and redo the timeline without the misleading lines. Check the dates for the fossils because there are several in the wrong place on the older timelines.
Does your timeline of life have photos of extant animals or plants in prehistoric times? This gives a very wrong impression. I’ve seen a timeline that had “First marsupial” and a picture of a kangaroo. This is just like saying “First eutherian (placental) mammal” and showing a picture of a horse. Both the kangaroo and the horse evolved within the last few million years. They are both adapted to live on grasslands and open shrub lands, where resources are spread out, and there is little cover from predators. Therefore both are good at moving quickly over long distances. Neither one of them belongs in the Mesozoic Era on a timeline of life. Mesozoic mammals were much smaller and less specialized.
Does your timeline have the five major extinctions? And does it have ice ages in the right places? The older charts used ice to symbolize all extinctions, although that wasn’t the cause in most of them. The five major extinctions come at the end of the Ordovician, Devonian, Permian, Triassic, and Cretaceous Periods. They are such important shapers of life that they are essential to a good timeline.
If all this correcting sounds like too much to do, remember that you are doing it for the children. They need current information and a foundation that they can use in their future studies. There is no point in giving them science “information” that they will never see outside a Montessori classroom.
In the Northern Hemisphere, many schools are beginning their new year. Others around the world are in the last term for their school year. Wherever you are in your yearly cycle, please make time for fact-checking the science materials your children use in their classroom.
By fact-checking, I mean that you read the text and look at the illustrations for the learning materials that children will see. Then you confirm the information with reliable references. This sounds fairly straight-forward, but it is time-consuming, and therefore few people do it.
Fact-checking is absolutely critical because anyone can print materials, whether or not they are familiar with the subject matter. The visual impression and first information that children get from a chart will stick with them, whether it is accurate or not.
Some authors of Montessori materials are conscientious and carefully research their works. The illustrations on this page are the animal and plant kingdom charts from InPrint for Children, a company which always produces quality materials that are beautiful and accurate. Its owner and designer, Carolyn Jones-Spearman, is a perfectionist, and it shows in her work. That is why I partner with InPrint and sell those materials.

Unfortunately, some authors produce materials with errors or misconceptions because they don’t take time to learn the subject matter or because that is the way they’ve always done it. Some purchase a company and continue to provide its same materials without evaluating them. Certainly, there are commercially available materials that are not suitable as learning materials for children, either because they are outdated, or present false or misleading information.
It appears that all adults who create materials for elementary Montessori children do not have a good grasp of science subject matter. Running a business, printing materials, and marketing them are important skills for a business, and some do that well, even though they are not good at writing or researching valid content. Just because the ads look good, don’t assume that the materials are great.
I suggest that you go over all the materials you will provide to the children, whether those materials are newly printed or older ones that you have in the closet. If the volume is too great for you to cover, perhaps you can get help from older elementary children or secondary students. Children should see fact-checking as a useful activity for anyone.
First, look at the material and its illustrations. Do the illustrations give a clear picture of the subject? Are they indeed examples of the subject? I have seen charts illustrated with organisms that are not the ones being described. I have also seen superficially attractive charts that had artistic but wrong or confusing illustrations. A scientific illustration should clearly depict the features that children need to learn.
Next, read the text. Are there spelling or grammar mistakes? Does the language read smoothly, and is it concise? Most importantly, does the text convey the information clearly? The descriptions on a science chart shouldn’t be a dull list of facts, but they should not be wordy or have convoluted language either. Authors for children need to be held to the same standard of writing as a professional writing for adults. It should be our goal to provide children with examples of good writing in all their materials.
What do you do if you find less than acceptable content in a material? I strongly suggest that you write the publisher or seller of the material and give them a description of the problem. If the content needs to change, as most of biological classification has done in the last 20 years, authors need to know this. Don’t be shy in asking for a corrected version. See how the seller responds. You may wish to return the material and ask for a refund. It shouldn’t matter if you have had the material for a while. If it has serious defects, then you should be able to return it, and you may wish to warn your fellow teachers. Until teachers put pressure on the publishers of Montessori materials to get rid of their mistakes, commercially available products are not likely to improve.
That being said, if you find a simple typo, try putting a white sticker over it and correcting it yourself. The publisher would probably be grateful to have your corrections, but this is not the sort of thing that should cause you to return a material.
I certainly welcome reports of any spelling or grammar mistakes in my works. I seldom get them, however. When I went back through my Plant Lessons book before I printed it last spring, I found a number of grammar mistakes, often having to do with the placement of commas. I’m still learning and striving to improve my writing skills.
If you have specific questions about the contents of a science material, and you have not been able to find the answers on your own, you may email your questions to me. I will try to answer them, although I can’t guarantee how quickly. I'll address finding reliable sources of information in a future blog.
Priscilla
Last June, the organization that officially recognizes the discovery of chemical elements and their names announced the proposed names for the final four elements on the periodic table. This governing body, the International Union of Pure and Applied Chemistry (IUPAC), took suggestions from the discoverers of the elements and then it issued the proposal. People could submit comments about the names for several months, and then in November, the IUPAC published the names. This was the final step in making them official.
The element names and atomic numbers are: nihonium (Nh) for element 113, which is named for the country of Japan; moscovium (Mc) for element 115, named for Moscow, Russia; tennessine (Ts) for element 117, named for the state of Tennessee; and oganesson (Og) for element 118, named after a Russian scientist who helped discover several elements, Yuri Oganessian. A new periodic table with these names is available at the IUPAC website, https://iupac.org/what-we-do/periodic-table-of-elements/ .
So what does this mean for the Montessori classroom? Children are ready for the abstract idea of chemical elements when they are in their elementary years. When they get an introduction to the periodic table, it should include the full set of names. Children should get a least a brief story of how elements get their names and how governing bodies of science fields bring order to science knowledge.
Children need to know, however, that there are elements that one cannot see with one’s eyes. There are quite a number of elements that are known only by the energy, particles, and atoms produced when they undergo radioactive decay.
The image below is from my newly updated card set, Discovering the Periodic Table. It comes with two sets of cards for all 118 elements, one in color and one in black and white. The card on the left is an example of the color set, and in this case sodium's symbol is color-coded red to show it is one of the alkali metals. The other card is the back of the black and white card, and it shows the type of information given for each element - physical properties, chemical properties, and other information. The front of the black and white card is like the card on the left, but with the symbol only outlined.

I updated and expanded Discovering the Periodic Table last summer after the new names were announced. At that time I added some features to help children understand the nature of the largest elements. The elements that cannot be made in visible quantities have symbols with a dotted outline rather than a solid one. The smallest of these is astatine, atomic number 85. Scientists have calculated that if one could make a piece of astatine, it would instantly vaporize itself because of the energy released by its vigorous radioactive decay.
If you tell children this, they may wonder how such an element was ever discovered. If they don’t think of it, help them arrive at this question. We want children to think about what they hear and ask about how we know what we know. The idea to search for astatine came from its place in the periodic table. Mendeleev left a blank beneath iodine on his first periodic table, implying that there was another element in the halogen family. Researchers that first identified this element used a nuclear reactor to bombard bismuth, atomic number 83, with alpha particles. This added two more protons to bismuth nuclei, and produced a small amount of astatine, which quickly decayed. Later, when researchers knew astatine’s characteristics, and they were able to find tiny traces of it in uranium ores.
After astatine, the next element that can’t be made in visible amounts is francium, atomic number 87. The dotted outline symbols don’t show up again until atomic number 101, mendelevium. It and all larger elements cannot be made in visible amounts. Researchers have made so little of elements 104-118 that the chemical properties of these elements are also unknown. In the cards with color-coded symbols from Discovering the Periodic Table, elements 104-118 have gray symbols to show that there is not enough evidence to assign them to a chemical group such the halogens.
Your children may ask if more elements can be discovered. In theory there could be, but if someone does discover more elements, it will be bigger science news than any recent element discovery. Meanwhile, help 6-9 year-olds explore the common everyday elements with the cards set, Elements Around Us from InPrint for Children. The set, Element Knowledge, will help 9-15 year-olds learn element names, symbols, and several significant groups. This set includes the first 111 elements. You can add the names and symbols of the other seven if your children are interested. They certainly won’t see those symbols in any chemical formulas.
The first time I introduced children to the chemical elements, I wanted to give them a sense of where they might find these substances, either as single elements or in combination with others. Laying out the periodic table is one experience with the elements, but it is quite abstract and disconnected with everyday life. I wanted to help children learn about the elements in common substances, items they could encounter and experience.
I made a set of cards that had pictures of items, and I listed the major elements in each one on the back of the card. To let you know how long ago that was, I printed the lists of elements with a dot matrix printer and an Apple II computer. Fast forward a decade or so, and Carolyn Jones of InPrint for Children was designing a new series of materials for study of matter and atoms in Montessori elementary classrooms. We discussed the idea of a card set that shows common objects and their elements. She took the idea and produced an attractive set of cards that she calls “Elements Around Us.” Presently, only Big Picture Science sells this set.

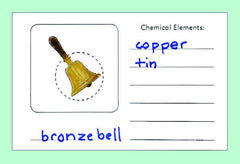
“Elements Around Us” has photos of 20 objects. The set includes two copies of each card, one to leave whole with text that tells the elements, and one to cut apart for matching. We intentionally used some substances to simulate thinking. The photo of a cotton towel (which is mainly cellulose) and table sugar both say “This is composed of carbon, oxygen, and hydrogen.” Cellulose is a macromolecule that is built of sugar molecules. These cards lead to the concept that elements can be joined in many ways to make different substances. The card that shows gold colored coins lists no gold as an ingredient. There are cards for carbon in the form of graphite and of diamond.
After children have worked with the cards, they are often interested in doing more. The “Elements Around Us” set has a black line master called a replicard, which you can copy for children so they can make their own booklets. They can color the outline drawing and write the elements. There are two blanks for children to draw their own object and research its elements.
Elementary children who are past the stage for card materials or who want to pursue the idea further will likely enjoy How to Make a Universe with 92 Ingredients, a book by Adrian Dingle. The book, Planet in a Pebble, by Jan Zalasiewicz, begins with a chapter on the elements in a common beach pebble. This book is for adult general readers, but selections from it can be read to older children or read by secondary students.
Happy element hunting!
I’ve heard from teachers that they are not sure what to buy or how my materials fit into their lesson sequence. Here is some information that I hope helps you with those decisions for your botany studies, as well as a link to our complete range of Montessori botany materials.
Plant Lessons: Introducing Children to Plant Form and Function. This book is the anchor for your botany studies. It gives you the lessons you need to present children with the parts of plants and what those parts do. It starts with basic lessons and continues through elementary, at least. At middle school level, it is helpful for review and to fill in gaps in plant knowledge that children may have.
For early childhood – Basics lessons on the parts of a plant, kinds of roots, and the parts of a stem, leaf, flower, fruit, and seed. Other lessons on the whole plant – deciduous and evergreen, plant life cycles, growth forms, and basic reproduction (whether the plant makes spores or seeds, or reproduces vegetatively). The five basic leaf shapes, and other leaf lessons as needed.
For first level elementary (6-9 year-olds) – All the lessons are appropriate, although it is highly unlikely that all be needed in the first three years of elementary. If children have not had the basic lessons listed under early childhood, they should receive those first. Past basic lessons, the lessons can be guided by the available plant materials. Lessons such as “Woody Stems in Winter” are best when the real plant material is available. Flower lessons can be matched to the flowers that are available. It is more important to use the lessons to further children’s knowledge of real plants than to march through all the nomenclature. If you follow the development of plants on your school grounds and in the area through the year, and supplement with cut flowers, you are likely to give your children an excellent foundation in botany.
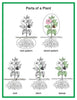 Illustrated Botany for Children is the botany nomenclature booklets and three-part cards for the children’s work in botany. The language level is simple enough that the young reader can manage it with a bit of help. There is a nomenclature booklet and accompanying cards for each of the lessons in the Plant Lessons book. The wall charts (summary charts) give a visual overview of each lesson and help children remember and review the content.
 48 Flower Cards for Study and Sorting (Botany photo card set 3) is useful both to use in flower lessons and in follow-up work for the children. The table that comes with the cards tells which cards are useful for a wide range of flower lessons. For example, children can sort cards that show tepals vs. petals and sepals, or they can use the cards to practice finding stamens or pistils.

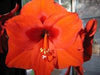 The Story of Poinsettias and The Amaryllis are children’s books for beginning elementary. These are available as files that you print. They are illustrated with color photos that show the botanical details. When these flowers are in season, the books are a great way to help children see the flowers’ important details. These books also work as a read-aloud for younger children.
 Early Spring Flowers is another file that you print to make study and research starter cards. It helps children learn the names of flowers and see those challenging inconspicuous flowers on trees like maples and alders. Older children can learn more about the flowering plant family and other plant classification.
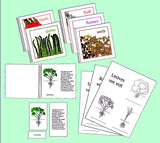 Plants We Eat is a set of six booklets and matching cards for kindergarten and beginning elementary. This material from InPrint for Children is a great way to make lessons on the parts of a plant more meaningful. The set includes a master for copying booklet for the children to color and label.
 Leaf Characteristics is another set from InPrint for Children that is very useful for kindergarten and beginning elementary. It helps children learn to observe the pertinent features for leaf description and is a good foundation for more advanced leaf studies.
I'll continue with recommendations for older elementary children and middle school level another day (but you can always email me with your questions). Today I feel the need to get my hands in the soil and observe my own garden plants.
Priscilla
 Big Picture Science now sells the Animal Kingdom Chart from InPrint for Children. Our stock is the latest printing of this chart, so it has new features. Carolyn Jones Spearman, who is the owner and designer of InPrint for Children, is meticulous in her images and designs. Each time she reprints this chart, she consults me for the latest updates.
With the high rate of change in life science, fueled by new DNA information and Tree-of-Life paradigms, there has been something to change on each printing. On this one, the material is a laminated sheet that lies flat. The color scheme is refined, and there are two new labels placed near the bottom to show the animals that are on the protostome and deuterostome branches of life. These branches are shown on my Tree-of-Life diagram for the animal kingdom.
If you are not familiar with these branches, they are explained in my book, Kingdoms of Life Connected. Briefly, the protostome (“mouth first”) lineage includes mollusks, annelids, arthropods, and roundworms. The deuterostome (“mouth second”) lineage includes echinoderms and chordates. One interesting difference between these two lineages is that identical twins are only possible in the deuterostomes. Their fertilized eggs keep the ability to develop into many tissues through several cell divisions, whereas the protostome cells specialize early. The deuterostome embryos can be divided in half and go on to form two individuals. The protostome embryos die if they are divided in half.
InPrint for Children’s Animal Kingdom Chart includes color cards to place on the chart. Each one illustrates an animal and has information about it on the back. There is a subtle clue to the animal’s environment in the shading behind the animal’s image. If the shading is blue, the animal is aquatic. If it is green, the animal is terrestrial, and if it is pinkish, the animal is a parasite.
This animal kingdom chart provides further experience for children, after they have seen the place of the animal kingdom in the Tree of Life, and after they have an introduction to the major branches of the animal kingdom. Those introductions can be done with my Tree-of-Life charts. The advantage of the chart from InPrint for Children is that it gives children more practice and introduces them to more members of the lineages of animals. The grouping of phyla on the chart reflects the branches on the Tree of Life. For instance, the arthropods and the roundworms, members of the molting animal lineage (edysozoa) are placed side-by-side with a wider margin between them and other branches of animals.
The InPrint for Children chart clarifies the confusion between chordates and vertebrates. Some Montessori materials show non-chordates and chordates rather than invertebrates and vertebrates. Those two groupings are not the same. The tunicates and lancelets are invertebrate chordates. The line on the bottom of the chart shows which animals are vertebrates and which are not.
There is a lot to learn by working with this chart. I hope you and your children find it an inspiring entrance into study of the animals.

Update: I am sorry to say that the magnetic periodic table is sold out and InPrint for Children doesn't want to print more at this time. The names of several elements have been added since this material was created, and it would take an extensive re-do to make it current. I suggest that you take a look at the set, Discovering the Periodic Table, which is available printed and as a pdf that you print for yourself. https://big-picture-science.myshopify.com/collections/physical-science/products/discovering-the-periodic-table
We have a few more of the periodic tables with magnetic tiles from InPrint for Children, so I’ve added it to my product listings. I helped design this periodic table several years ago, guided by the principle of “isolate the difficulty.” Each tile has only an atomic symbol and the atomic number that goes with it. The background color of the tiles codes for metals, metalloids, and nonmetals. Hydrogen gets its own color as a reflection of its special role in the universe. With this simplified periodic table, children can see the big patterns of chemical elements before they have to deal more advanced periodic tables with their overwhelmingly busy look. When you look at this periodic table with all the tiles in place, you will likely be struck by the number of metals versus nonmetals. Five of the six main elements of life are nonmetals, and you see that nonmetals are a small fraction of the total elements. Children will also see the state of matter of each element at room temperature from the border around the square where the tile goes. With enough heat, all would be gases. With enough cold, all would be solids, but it would take near absolute zero for that to happen. Children enjoy constructing this periodic table several times, and they learn the location of elements as they do so. They can learn the element names when they refer to the table that comes with this set. The table also shows the origin of each element, whether it was formed by the Big Bang, by cosmic rays, in the center of stars, during supernova explosions, or synthesized in laboratories.
In its present production, this periodic table is printed on a heavy-weight magnet-receptive vinyl. It needs to be mounted on a rigid backing material. Suggestions for backing materials come along with the teacher’s background information. I mounted my own on white board material, and then added a narrow wooden frame to secure the edges. This arrangement has survived several trips to conferences, teacher education programs, and workshops.
Coupled with samples of a few metals, sulfur, carbon, and silicon - safe substances for children to handle, this material is a great way to introduce children to the chemical elements.
I wanted a way to make the chemical elements less abstract and more a part of children’s experiences


 botany studies. It gives you the lessons you need to present children with the parts of plants and what those parts do. It starts with basic lessons and continues through elementary, at least. At middle school level, it is helpful for review and to fill in gaps in plant knowledge that children may have.
 Illustrated Botany for Children is the botany nomenclature booklets and three-part cards for the children’s work in botany. The language level is simple enough that the young reader can manage it with a bit of help. There is a nomenclature booklet and accompanying cards for each of the lessons in the Plant Lessons book. The wall charts (summary charts) give a visual overview of each lesson and help children remember and review the content.
 48 Flower Cards for Study and Sorting (Botany photo card set 3) is useful both to use in flower lessons and in follow-up work for the children. The table that comes with the cards tells which cards are useful for a wide range of flower lessons. For example, children can sort cards that show tepals vs. petals and sepals, or they can use the cards to practice finding stamens or pistils.
 The Story of Poinsettias and The Amaryllis are children’s books for beginning elementary. These are available as files that you print. They are illustrated with color photos that show the botanical details. When these flowers are in season, the books are a great way to help children see the flowers’ important details. These books also work as a read-aloud for younger children.
 Early Spring Flowers is another file that you print to make study and research starter cards. It helps children learn the names of flowers and see those challenging inconspicuous flowers on trees like maples and alders. Older children can learn more about the flowering plant family and other plant classification.
 Plants We Eat is a set of six booklets and matching cards for kindergarten and beginning elementary. This material from InPrint for Children is a great way to make lessons on the parts of a plant more meaningful. The set includes a master for copying booklet for the children to color and label.
 Leaf Characteristics is another set from InPrint for Children that is very useful for kindergarten and beginning elementary. It helps children learn to observe the pertinent features for leaf description and is a good foundation for more advanced leaf studies.
 Big Picture Science now sells the Animal Kingdom Chart from InPrint for Children. Our stock is the latest printing of this chart, so it has new features. Carolyn Jones Spearman, who is the owner and designer of InPrint for Children, is meticulous in her images and designs. Each time she reprints this chart, she consults me for the latest updates.